How to Pause and Continue Recording on Nikon Keymission 360
 Once you've captured some KeyMission 360 footage it's time to edit and upload to YouTube. To do this Nikon has provided an application called Nikon KeyMission 360/170 Utility that will enable you to quickly edit and export your footage ready for uploading to YouTube.
Any 360 footage produced by the Nikon KeyMission 360, or for that matter any other 360 or VR camera, requires special metadata that needs to be attached so that YouTube is able to recognise the video as 360, rather than standard flat footage. For many other cameras this means that the footage, once edited, needs to be run through Google's 360 Video Metadata Tool.
KeyMission 360/170 Utility, however, has the ability to do this all for you with a built-in option to save your movies. This automatically adds the metadata, but before we do this lets first take a look at the KeyMission 360/170 software and how to edit and export your video ready for YouTube 360.
How to edit Nikon KeyMission 360 footage for YouTube
- Navigate to clip using the browser local option
- Click on the clip you want
- Click 'Edit' in the options at the top
- Use the play head to navigate to where you want your movie to start and click 'Start Point'
- Use the play head to navigate to where you want the movie to end and click 'End Point'
- Click 'Create Movie'
- Click in the file browser and select the movie you just created
- Click 'Save for YouTube'
The file you save is now ready to upload to YouTube in the usual way. For more information, screen shots and a few more options check out the steps for how to edit and export your Nikon KeyMission 360 video for YouTube.
1/ Download and open KeyMission 360/170 Utility
Start by downloading your footage from the Nikon KeyMission 360 to your computer. If storing and organising video is new to you then this is a good system to use:
1/ Navigate to your 'Movies' or 'Videos' folder on your computer.
2/ Create a new folder for the camera (I do it this way due to using a variety of different cameras, but even if the KeyMission is your only video camera then it's still worth doing.)
3/ Now in this new folder create another folder labeled with the year '2016' then the month '10' (or whatever month it is) then the date along with a description, 27 – New Forest. You should have a directory structure that looks like Movies > 2016 > 10 > 27 – New Forest, as you can see it now makes it quite easy to find things and helps when searching using your computer's built-in search features. Now copy the video files from your Nikon KeyMission 360 into the folder you just created.
I shoot lots of video, so for me breaking it down to year, month and date makes sense, but as I've discovered this can be over complex for many users. If this is the case, customise to your needs. You may just want to go with Movies > 2016 > 1027 – New Forest or even just Movies > 20161027 – New Forest. It's really up to you.
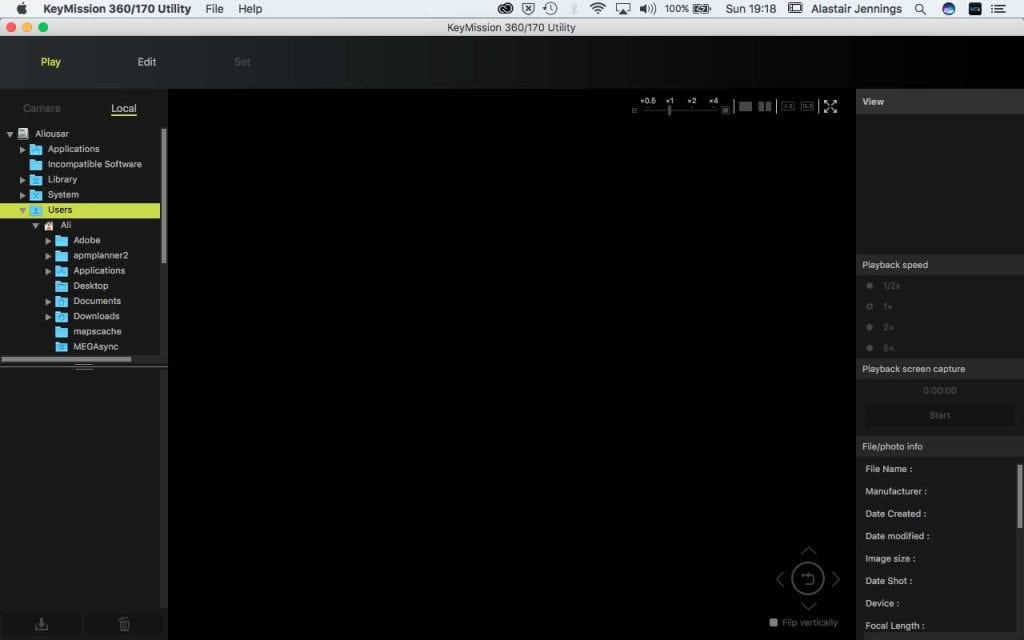
Once you've downloaded the footage open KeyMission 360/170 Utility and then on the left side of the interface, click on the local option and navigate to the folder you just created. You'll see clips contained in the folder appear below the directory structure.
2/ Open a clip in KeyMission 360/170 Utility
In the file preview browser, click on the clip you would like to see. As soon as you do this you'll see the video appear in the main preview window. To change the clip being previewed, just click a different thumbnail in the browser. Don't worry about the quality of the clip that appears, this is just a low resolution render of your movie and not the final quality.
Clicking into the preview window will now enable you to drag around the screen and the 360 video. Below the preview are the video controls, click play to start the movie, as the movie plays you can click in the window and move around the video.
 3/Edit Nikon KeyMission 360 video
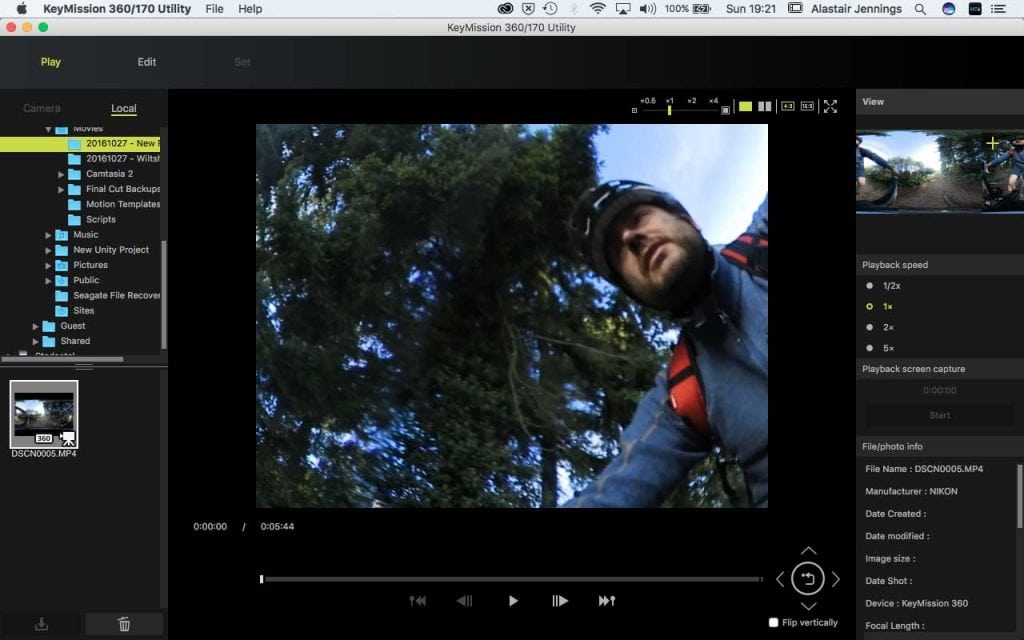
At the top of the interface you'll see three different options. When you start the Utility you will automatically be taken to the Play option. After previewing and selecting the clip you want to use click Edit. You can now move the playhead up and down the time line, you'll also see that over on the right of the screen you now have a new list of options, the first of which is 'Trim'. Below the options are three buttons, Start Point, End Point and Create Movie.
Before clicking any of these move the playhead to the point in the movie where you want your clip to start, you can do this by clicking in the timeline or using the video player controls. Once you get to the start point you want click the 'Start Point' button.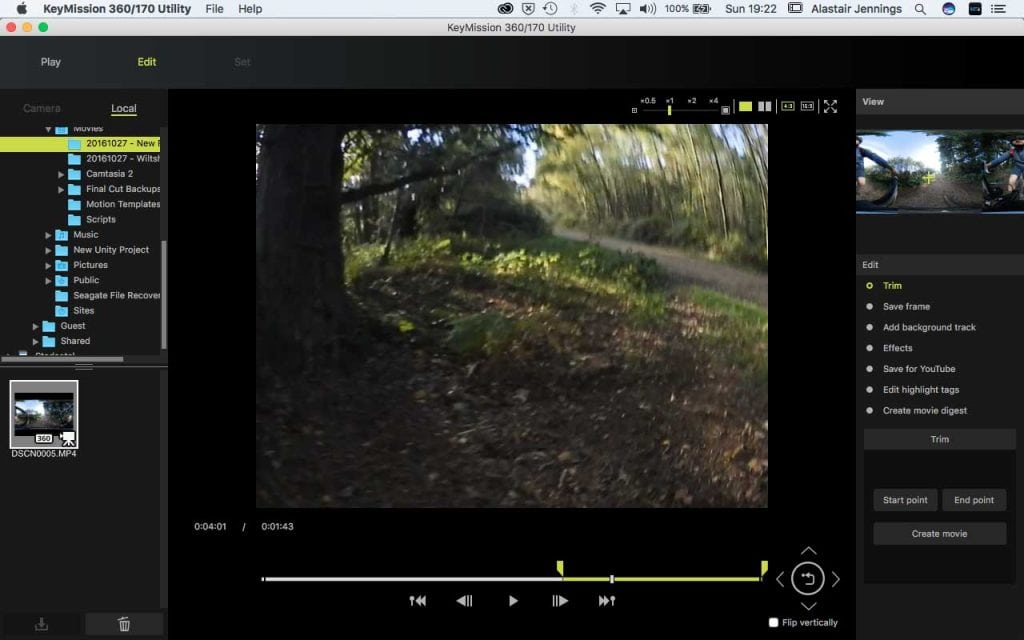
4/ Select the end point
Again click in the timeline to move the playhead to the end point, or use the player. Then once at the point you want the movie to end click the 'End Point' button.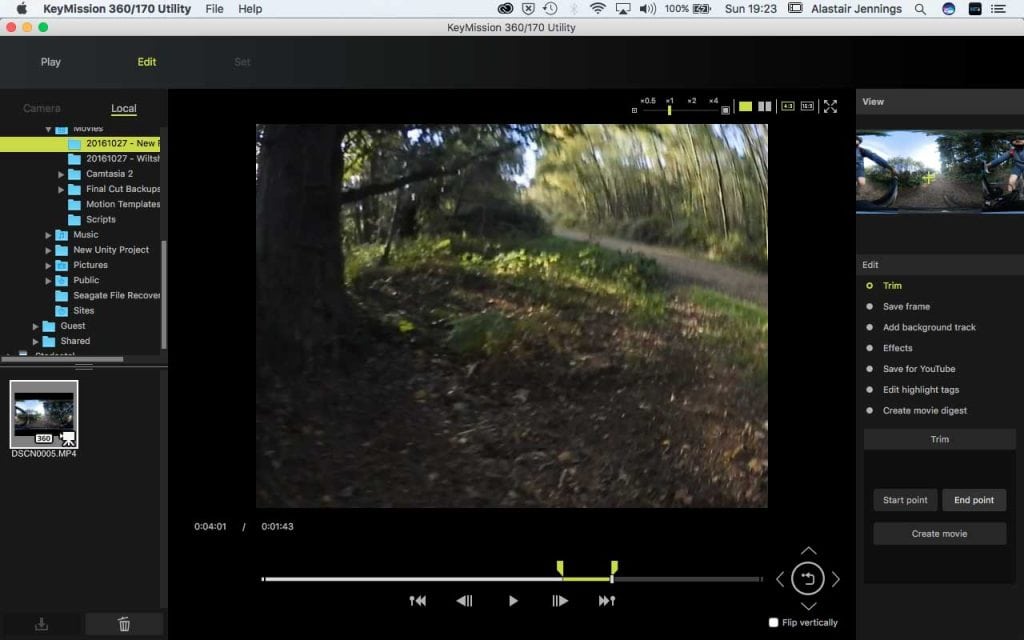
5/ Save your trimmed KeyMission 360 video
Before moving on you need to save the movie, click 'Create Movie' and save the file. For ease save it in a new folder in the same location as the original movie file, I use the same filename as the folder name, in this case 'DSCN0005'. The reason for doing this is that at present it's quite difficult to read the full names of files in the KeyMission 360/170 Utility file browser, so by naming the file 'Trim_DSCN0005' or something relevant to you the trim part of the file name is easy to see.
Once saved, click on the file to open it in the preview window.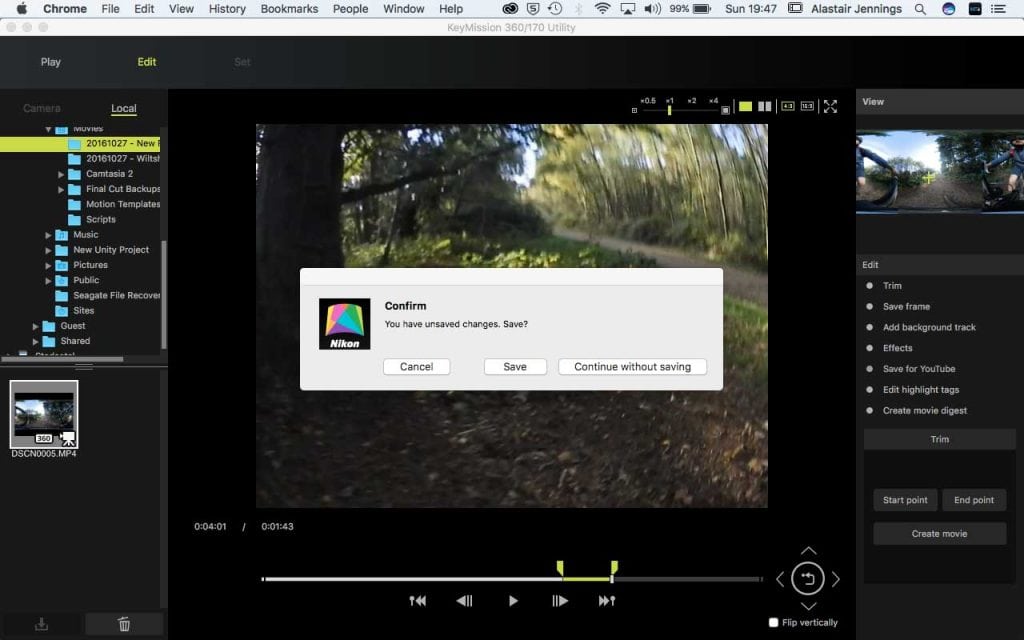
6/ Add a sound track to your KeyMission 360 video
In the Edit Menu on the right of the interface click 'Add background Track' to get access to a series of music samples. At present it's not possible to add your own. Once you've added music click OK. Again you'll be prompted to save the movie, save it this time with file name starting 'Music'. Once saved, click on the new movie in the clip browser to open in the preview window.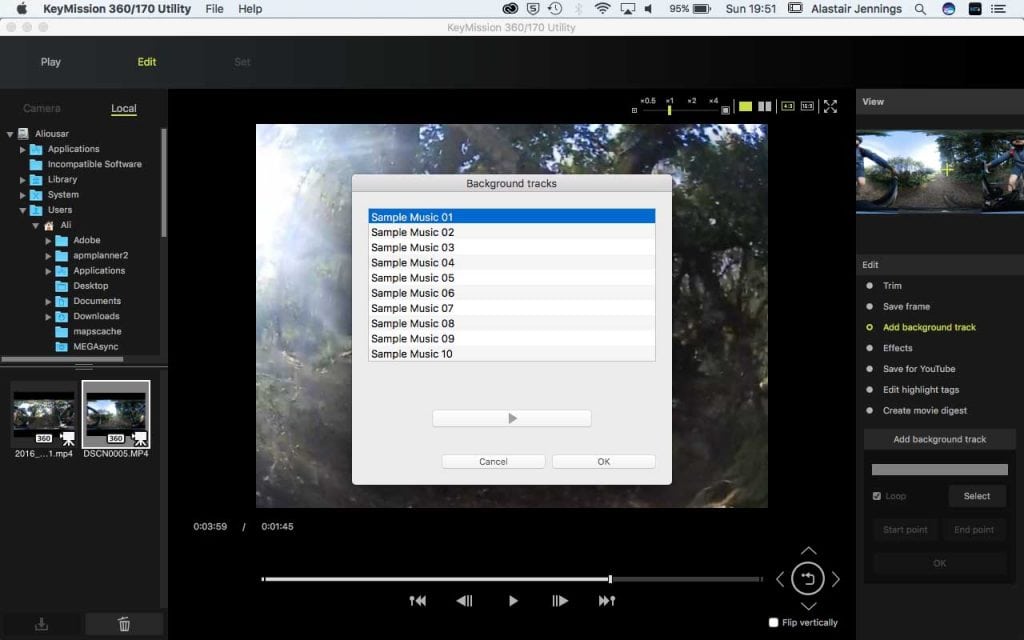
7/ Add effects to your KeyMission 360 video
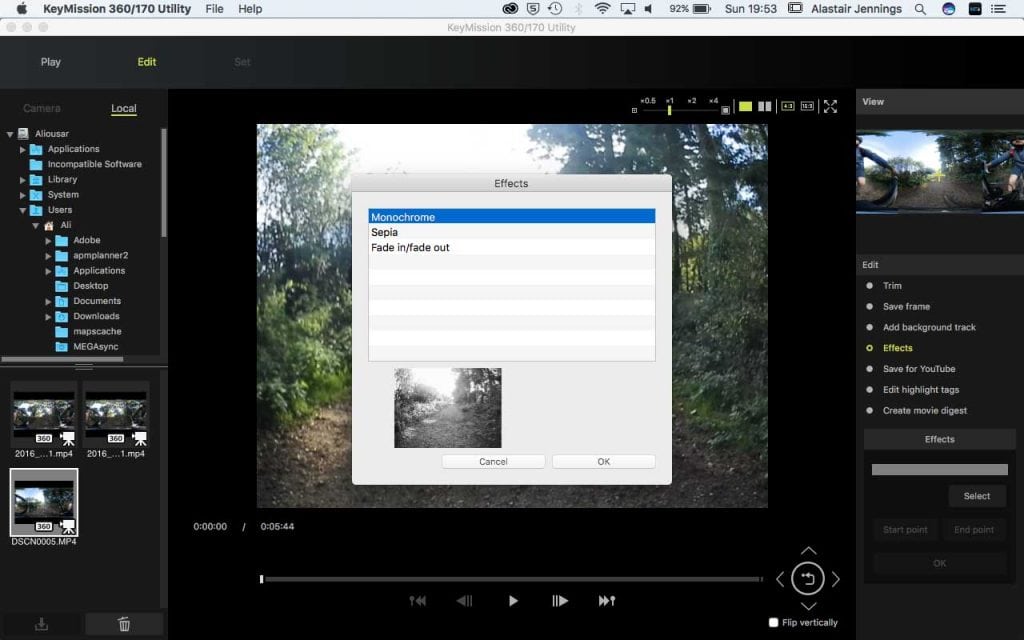
Click on 'Effects' and a window will open showing you a selection of different effects that can be applied to your movie. At present the options are limited with Black and White, Sepia and Fade in/out, again once selected and you click OK you will need to save the file. This time replace 'Music' with 'Effect', then select the new video so it opens in the preview window.
 8/ Save your KeyMission 360 video for YouTube
Now click 'Save for YouTube' in the 'Edit' menu, again renaming the file from 'Effects' to 'YT'. Once the export is finished you're ready to upload and the 360 metadata will be automatically added.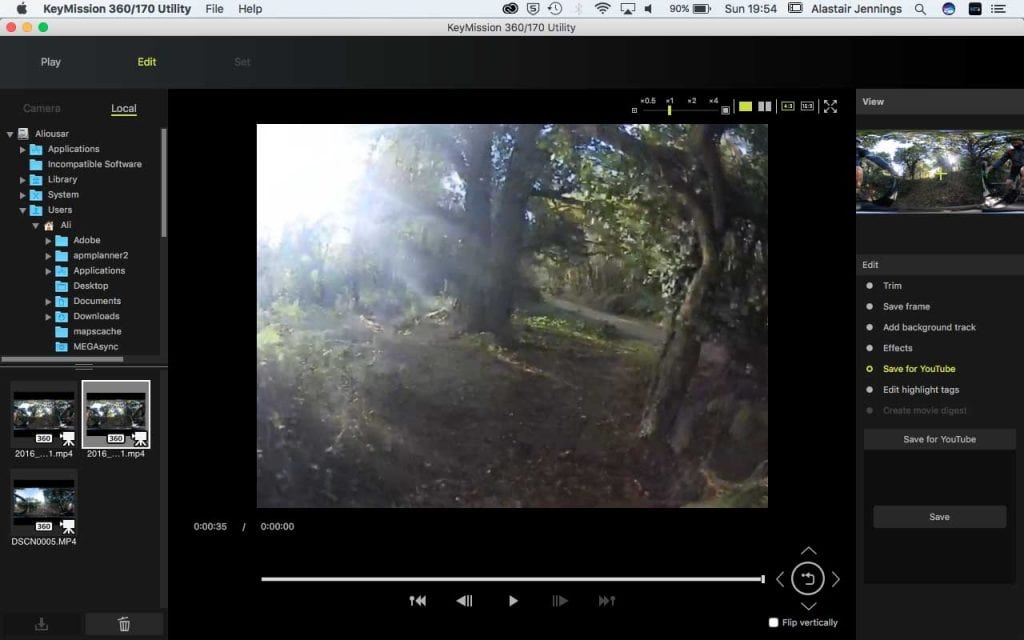
For my first impression of the Nikon KeyMission 360
Check out some sample videos from the Nikon KeyMission 360
- 360 Cameras
- Action Cameras
- Cameras
- Nikon KeyMission 360
Source: https://camerajabber.com/edit-nikon-keymission-360-video/
0 Response to "How to Pause and Continue Recording on Nikon Keymission 360"
Post a Comment